Monday, November 30, 2009

Angry Caramel Cupcakes

My neighbors play loud music all night long, and it drives me nuts. So I decided to make caramel cupcakes. My reasoning was usually you give someone caramel, it is all sticky, they are quiet for awhile. And I really want them to be quiet.  After I made them I was going to walk these lovely cupcakes over there as a peace offering. In the end they ended up being too delicious to share with mean loud neighbors.

After the cupcake baking process was finished and I was able to try one of my creations I realized I wasn't quite as seething-ly furious anymore, so I dub these Angry Caramel Cupcakes. Bake then when someone is driving you mad.

Ingredients
2 1/2 cups flour
15-20 caramel squares ( I got mine from the bulk section of WinCo )
1/3 cup brown sugar
2 eggs
1 teaspoon vanilla
1 teaspoon baking soda
1 teaspoon baking powder
1 1/4 cup evaporated milk
3 tablespoons butter

Directions:
1. Preheat oven to 350° F
2. In a saucepan melt the butter on low
3. Once the butter is melted begin adding the unwrapped caramel squares two at a time until they are all melted while mixing constantly
4. Take the pan off the heat and add the evaporated milk a little bit at a time, making sure it is completely blended before adding more until they are entirely integrated
5. Dump the mixture into a large mixing bowl and add the eggs then beat thoroughly.
6. Add the vanilla, brown sugar, baking soda, and baking powder; continue beating the mixture
7. Add in the flour and mix until you have batter.
8. Fill each cupcake tin with 1/4 cup of the batter and bake for 15 minutes.

I made butterscotch frosting to go with these, but it turned out really strong and I didn't want to overpower the fantastic flavor of the cupcakes (which really could be served sans-frosting) so I didn't use much, but here is the recipe.

(I really love making whipped pudding frosting because it is so easy)

1 cup heavy whipping cream
1 package of butterscotch pudding
1/8 cup milk

Put them all together in a bowl and beat on high until it is incredibly thick.

Please enjoy these cupcakes and make them instead of maiming the annoying people in your life.

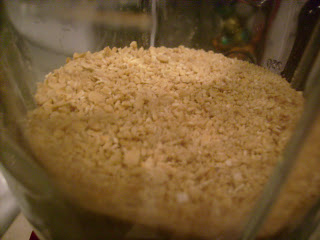
This is what the caramel should look like when it is fully melted.

Announcing Little Frosted Adventure's Quest for a Logo Contest! And later tonight a new cupcake recipe.

Little Frosted Adventures needs a logo-

Everyone is welcome to participate, tell your friends, tell artistic people, email your family, spread the word.

Here are the rules:
1. It has to involve cupcakes somehow
2. It has to be PG, child friendly, you know what I mean
3. Your submission has to be emailed to me at littlefrostedadventures@gmail.com
4. You can submit as many designs as you want!

To encourage people to enter there will be a prize (which will be announced soon) for the winning logo!

The winning logo will be released on the 1st of January 2010, and obviously whomever wins will have the bragging rights for the rest of time as it will be featured on Little Frosted Adventures.

Sunday, November 29, 2009

Sustainable cupcakes: Trial 1 and 2


I apologize in advance for how terrible the formatting is toward the end, I don't know what happened

For my science class, my peers and I were challenged to make sustainable foods, I of course decided on cupcakes. To be sustainable, everything must be local and organic, this posed a problem because of sugar.

I found out that maple syrup could be substituted for sugar, so I geared my recipe towards that.

Here is my recipe:

1/3 cup butter
1/2 cup maple syrup
1 teaspoon vanilla extract
1 cup unsweetened yogurt
1 1/2 cup granola
2 cups flour
3 eggs
1 teaspoon baking powder
1 teaspoon baking soda
1/2 teaspoon salt
(to make the cupcakes more moist add 1/3 cup milk)
1 Tablespoon ground cinnamon  - I couldn't figure out a way to cut out spices without making horribly bland cupcakes.

Now, as it turns out, organic, sustainable ingredients are quite pricey, so my cupcakes are less sustainable and more representative of a future sustainable recipe. I used, imitation maple syrup (Lumber Jack Syrup to be precise), Tillamook butter, Tillamook vanilla yogurt, french vanilla granola, red mill locally ground flour, locally produced eggs, and the rest of the ingredients I had on hand.

  1. Preheat the oven to 350° F
  2. You'll want to blend the granola using chop, or your favorite blender setting, until it is finely ground
  3. In a large bowl beat together melted butter, maple syrup, vanilla, and egg yolks
  4. Add the flour, blended granola, cinnamon, baking soda, and baking powder then mix well
  5. Add in the yogurt (and milk if using) and continue mixing
  6. In a separate bowl beat the egg whites until stiff peaks form (or skip this step and just dump the rest of the egg whites into the mixture for a more dense muffin like result)
  7. Fill the cupcake tins 1/2 to 3/4 full and bake for 18 minutes
My cupcakes turned out very muffin like and dense, but quite tasty.
(I couldn't get my egg whites to cooperate)

For frosting I made whipped cream/cream cheese/maple syrup frosting which was really good.

3/4 cup whipping cream
1/8 cup cream cheese
1/8 cup maple syrup

Basically they way one would go about making it would be to just beat it all together on high until frosting appears.

I forced these cupcakes on my husband and his friend Julia, they both enjoyed them, but agreed that they were very muffin-y. In Trial 2 I'm going to add some milk and try a different frosting.

Here are some pictures to help explain the process:

This is how fine my granola was after blending


While baking they puff up quite nicely, which I didn't expect.
Julia thinks these in the oven pictures all look the same, perhaps I'll have to find another step to photograph.


And finally the finished product, I was really excited to try out my new pastry bags I got on black Friday at Michaels but the frosting is really light and fluffy, thus hard to frost with, so they look sort of sloppy. Perhaps the frosted is the most adventurous part of Little Frosted Adventures.


And here is a picture of me and my science partner icing the cupcakes from trial 2


 And here is how they turned out.

Thursday, November 26, 2009

Thanksgiving Pumpkin Cupcakes- with super extra delicious cheesecake frosting


I wanted to make something special for Thankgiving this year and in my research of various recipes and ideas I came across a recipe for pumpkin pie with a layer of cheesecake which sounded really delicious. So to convert this idea to a cupcake, I thought about attempting to make mini pies, but I realized that was a disaster waiting to happen. So instead I decided to go with pumpkin flavored cupcakes with cheesecake frosting.
Now my recipe makes roughly 38 cupcakes depending on how full you fill the cups, so you might want to halve it.
(you might notice in this picture there is food coloring; that isn't needed)
Recipe:
2 Boxes of spice cake mix
1 29 oz (1 lb) can of pumpkin puree
1/4 cup milk
5 eggs
1/3 cup oil
1 tsp ground cinnamon
Frosting:
1 box of cheesecake pudding mix
3/4 cup whipping cream
1/4 tsp cream of tartar
1. Preheat the oven to 350° F
2. Make sure you do this in a really big bowl (I wasn't smart enough to use the biggest mixing bowl and had a ton of fun trying to keep the batter contained.)
3. Start by beating the oil eggs and milk together with the pumpkin puree.
4. Then add the cinnamon and make sure it is well mixed before beginning to slowly add the cake mix.
5. Once everything is mixed together scoop 1/4 cup or so into each cupcake liner/tin.
6. Bake the cupcakes for 20-23 minutes (also don't touch the hot inside of the oven when taking them out...that hurts)

To make the frosting add everything into a bowl and beat on high until it is really thick.

When it comes to how you'll frost your cupcakes, if you used this recipe I have to tell you it is really thick. I had originally wanted to frost my cupcakes like these adorable pumpkin pie cupcakes, but my piping bag sort of exploded all over my hand when I tried to squeeze this frosting out... sooo I went with something much simpler.
Here are some lovely pictures of the process for your enjoyment: