Saturday, January 1, 2011

Apple-cider-sicles and resolutions.

As the new year starts off I'm actually going to have a resolution, for the most part I have never had resolutions... I always thought they were sort of ridiculous, why wait until the new year starts to change your life, seems like you're already trying to put it off.


My resolution involves quite a few things, but the one that pertains to this blog is that I'd like to improve Little Frosted Adventures. So, exciting things are coming to Little Frosted Adventures this year, starting with a month of making things that are not a usual part of my repertoire. 


For the first post of the new year, I give you a very tasty treat that doesn't have the best plan of execution


Ingredients:
Apple cider (or any juice of your choice)
Vanilla ice cream (or any ice cream of your choice)
Popsicle maker thing


What I did....(not going to classify this as a recipe seeing as how it turned out


Tim ordered me the popsicle mold 
because he is nice
(sometimes)

I squished some ice cream into a layer on top 
of some parchment paper on a cookie sheet

I folded that ice cream up to make it more 
uniform in shape and froze it for half an hour

I stuck sticks in it after that

Squished some more ice cream on top of that,
 then froze it for another half an hour

Cut the ice cream into strips

Put the strips into the ice cream mold


I filled the excess space with apple cider
(I also had a few extra spaces which I filled

with only apple cider),
then stuck them in the fridge overnight

Tim and I stayed up to welcome in the 
new year, and he accidentally figured out
 how to make my screen do that, which
 terrified me; I thought he'd gone and broken it.


The results were sticks that came out without
 their popsicle. When the stuff was scooped
 out it tasted great though... So, I've just got
 to figure out how to remove them...

Here is one of the just apple cider ones....
they worked out just fine


Happy New Year! I look forward to sharing my food related adventures the next few months, I'm planning on a different challenge or theme each month, and I'd love to hear your ideas!

Sunday, December 26, 2010

Make your own cocoa mix!


The mini ginger bread houses for the edge of your cup needed some cocoa mix to accompany them as gifts. 

This is super super easy, I used this recipe minus the white chocolate chips

Ingredients:
3 cups nonfat dry milk
2 cups powdered sugar
1 1/2 cups baking cocoa powder
1/4 tsp salt

Directions:
  1. I started by blending the nonfat dry milk so that it was a fine powder
  2. Then I added the other ingredients to the blender and attempted to blend them
  3. This didn't go so well, so with the lid held on firmly I shook the blender until they were all mixed up
  4. I portioned it into baggies and gave it away with the ginger bread houses

Attempts at cookie architecture

Gingerbread houses have always been a love of mine, but I've always cheated when making them... using frosting to glue pieces of graham crackers to milk cartons, getting prebaked kits.... this year I decided I wanted to make these mini ginger bread houses for setting on the edge of a mug from Not Martha


I recieved a lovely ginger bread mix from a friend and wanted to use that


It was very sticky and hard to cut the pieces out...


And here are the unbaked ginger bread village ruins


When I baked the pieces from the mix they all rose and expanded and broke.....but they were very delicious. Since all the pieces were the wrong size and most of them were eaten I needed to make more dough, I decided to use to use a recipe my grandmother had cut from the newspaper for me. 
The gingerbread recipe from the whitehouse makes a ton, and I mean a TON of dough... 50 4x4 cookies.. thats 16 square inches a cookie, 800 square inches total.... thats a lot...Did I use it all? No...

Here is my version of their recipe
Recipe:
2 sticks softened butter
2 cups dark brown sugar
2 eggs
1 cup molasses
7 cups all-purpose flour
1 teaspoon (instead of 1/4) ground ginger, cinnamon
1/2 teaspoon (instead of 1/4) baking powder, salt
1/2 teaspoon (instead if 1) baking soda
(and I completely left out Zest of 1 lemon, 1 orange)


Directions:
  1. Beat together the eggs, sugar, butter, and molasses
  2. Add in the ginger, cinnamon, baking powder, salt, and baking soda. Make sure they're mixed in evenly
  3. Add in the flour in several parts, dumb in a cup or two, mix mix mix mix until it's in, then add some more. Scrape the sides of the bowl a lot...
  4. Next roll it out between two sheets of parchment paper a few scoops at a time while it is still warm and refridgerate the rolled out sheets until you're ready to use them (I'd say at least 20 minutes and they'll be fine to use)
  5. Preheat your oven to 350 ° F
  6. Cut out your shapes/pieces whatever, and bake for 10-12 minutes.


You see how much it makes?


This dough was soo much easier to cut the pieces out of


I covered the roof pieces in sugar before I baked them so they could have a snowy look to them


To ice them I used the royal icing recipe from Joy of baking 

Ingredients: 
2 egg whites
2 teaspoons lemon juice
3 cups powdered sugar


Directions:
  1. Beat everything together in bowl
  2. Transfer quickly to a piping bag
  3. Ice things, the gingerbread houses in particular
  4. let dry
  5. gift or consume


Wednesday, December 22, 2010

Muddy buddies


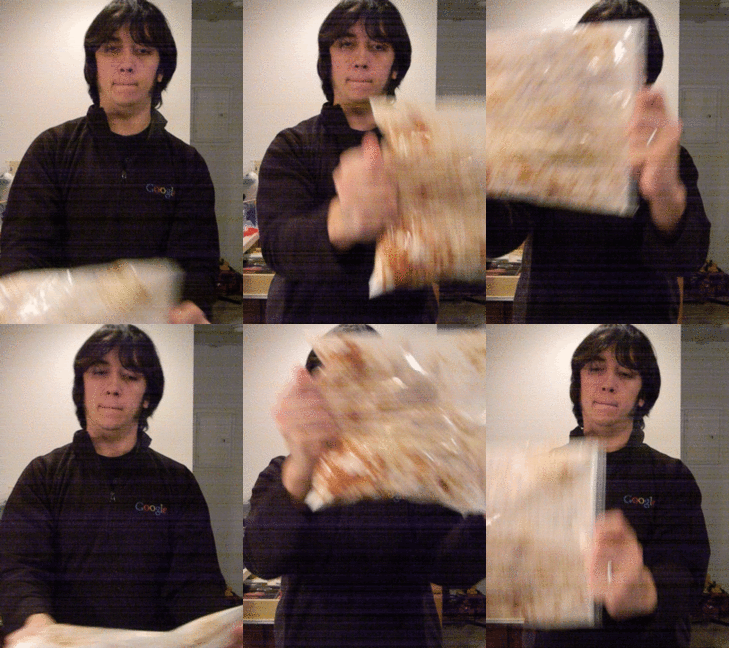
These muddy buddies were so much fun to make, which is why I have to start this post with the obnoxious picture of Tim shaking them up.

I was introduced to these last year, when my husband found them at waremart and immediately bought several bags, I had never heard of them before. One of our friends offered to make some, but we were impatient, we needed to eat them now. 

I got the recipe from chex

Ingredients: 
9 cups corn chex (I actually left this the same and doubled everything else)
1 cup semisweet chocolate chips (I used milk chocolate)
1/2 cup peanutbutter
1/4 cup butter
1 tsp vanilla (which I accidentally left out)
1 1/2 cups powdered sugar (I really just poured this in out of the bag it was in without measuring..)

Directions:
  1. In a quart sized bowl microwave chocolate, peanutbutter, and butter on high (for 20 seconds at a time stiring between each microwaving to prevent burning) until smooth
  2. Add in the vanilla (or not) and mix it up some more
  3. Dump that mixture on to the chex and stir until it is evenly (ish) covered (and don't cringe when you smash all of the chex....)
  4. Pour into a two gallon ziplock (or two one gallon) bag (s) and add in lots of powdered sugar
  5. Shake that bag like crazy
  6. They say you should spread it out on a cookie sheet and let it cool, but I just stuck the bags in the fridge (where you have to store it so it doesn't go bad)


And here is my husband shaking it up:


Stained Glass cookies


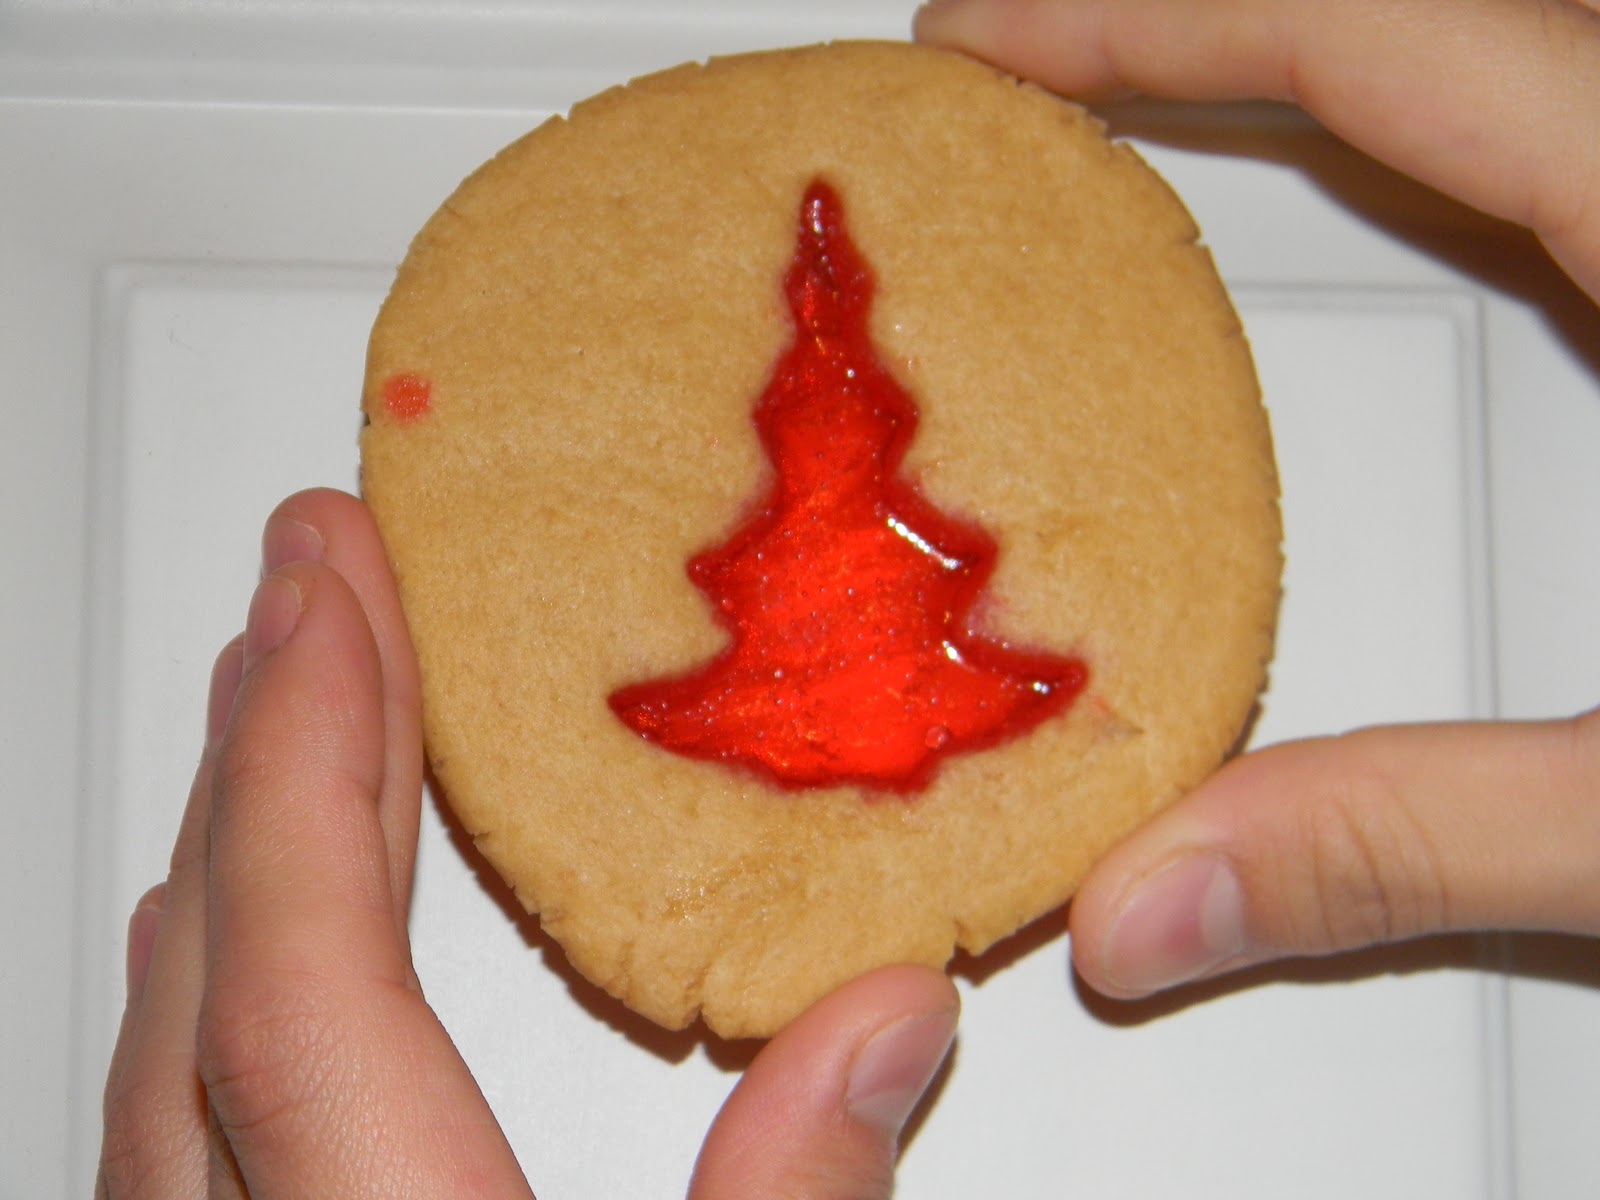
Stained glass cookies! When I started using parchment paper to bake things on to keep them from sticking I was amazed at how well it worked, and I started to wonder if I could actually make some of the amazing christmas cookies I always see in the baking magazines that look ridiculously complicated. I had always assumed that baking stained glass cookies would be awful, that the candy would stick to whatever it was baked on and it would all shatter when you tried to pry it off. I occasionally wondered if the cookies in the pictures were faked.

These didn't turn out perfectly, but I'm surprised by the quality my results. Many errors and complications more related to human mistake than the recipe got in the way. Though I read in many different places that these are more decorative than edible, I strived for eat-ability, that was probably error 1, error 2 was having my very very energetic little brother help, and error 3 was apparently confusing candy choice. 

So, these are great if, 1 you don't expect them to be easy to eat and perhaps only use them for decorative purposes or quieting loud people with sticky candy, 2 you don't give a 6 year old a hammer and tell him to smash candy, and 3 you use candy that people expect to find in the middle of christmas cookies, peppermint perhaps? 

I started out with this recipe but also drew inspiration from this one  

Recipe:
2 1/2 cups flour
1/2 cup white sugar
1/2 cup brown sugar
1/2 tsp vanilla
1 egg
1/4 cup heavy cream
1/4 tsp salt
3/4 tsp baking powder
+ 30 ish hard candies

Directions:
  1. Beat together the sugars, vanilla, egg, and heavy cream on high for about a minute.
  2. Add in the salt, and baking powder and mix it in thoroughly before adding in the flour
  3. You can either separate the dough into sections, roll it out 1/4 - 1/8 inch thick and then refridgerate it before taking cookies cutters to it, or roll it into a log, refridgerate it and then cut shapes out of the cookies cut from the log.
  4. Either way, refrigerate it for at least two hours before cutting
  5. While it is cooling, unwrap the candies and put them in a ziplock bag, wrap the bag in a towel and smash those candies with a rolling pin, or a hammer, or a mallet, or really any blunt object suitable for smashing things
  6. After you've allowed the dough to cool, cut out your shapes and fill the holes with the smashed candy.
  7. Preheat your oven to 350° F and bake for 10-12 minutes

Monday, December 20, 2010

Molasses cookies


Molasses cookies! I haven't baked much with molasses, but when I was walking through the store and saw the gorgeous glass bottles of it I figured I needed to make some molasses cookies. Making these was certainly an experience, while I was mixing them there was this smell and I couldn't figure out if it was a spice or what, but I hated it. Smelled just like pumpkin puree to me, and it was driving me crazy, I figured the cookies would be atrocious. I was planning later trials and examining the spices and all sorts of things so I could figure out what reeked, then I finished the cookies. The smell diminished and eventually vanished after they were all done, and I got up the nerve to try one of the cookies. These were so moist and had a very rich flavor, very delicious.

When I was working on the recipe I wanted to make sure there was lots of molasses so that the taste was really bold, little did I know that molasses would be one of my least favorite scents of all time (right up there with pomagranates and sulphur). I don't know how the rest of you feel about molasses, but after the cookies cool down they taste fantastic and smell dissipates. (Even my grandfather liked them and he is sort of picky)

Ingredients:
1 stick butter (softened)
1/4 cup heavy cream
1 cup sugar
1 egg
1/2 cup molasses
2 1/4 cups flour
1/4 cup cocoa
1/2 tsp salt
1/2 tsp ground cloves
1/2 tsp ground ginger
1/2 tsp nutmeg
1 tsp cinnamon
1/2 tsp baking powder
1/2 tsp baking soda
+1/2 cup sugar for coating the cookies

Directions:
  1. Beat the butter, heavy cream, 1 cup sugar and egg together until slightly fluffy
  2. Add in the molasses and coco and continue mixing (it will get this really awful looking texture, thats what it is supposed to do)
  3. Now is time for your spices and baking powder & soda (I don't like sifting it all together with the flour, so I just add it before and beat it in before the flour is added)
  4. Lastly the flour is mixed in.
  5. You'll need to chill the dough for while, I kept it in over night because I was tired and Nikolai was tired of baking, but an hour or two should work out just fine
  6. Once the dough is cold and firm you can preheat your oven to 375° F
  7. I used a 1 1/2 tablespoon cookie baller to make balls of dough then rolled them in sugar
  8. Place the cookies 2 or more inches apart on the cookie sheet and then use the bottom of a glass to squish them down a bit, I dipped the glass in sugar before pressing each cookie, it seemed to keep everything from sticking
  9. Bake for 8-10 minutes


I waited for days in anticipation of taking this picture,
then tormented Tim because I needed his help to take it.
(sorry Tim)


Chocolate reeses pieces cookies


While I'm planning out what will be made on my baking sprees I try to keep Tim in mind, because more frequently than not he is doomed to be my tester. When we were in high school there was a cookie stand at lunch that sold chocolate reeses pieces cookies and he would always buy some, so I figured it would be fun to attempt to recreate them.

Now as far as my recipes go, this was experimental as they come. I haven't made many chocolate cookies, so I was shooting in the dark. Luckily, they turned out wonderfully after a few alterations. They were thoroughly enjoyed at our birth class reunion, our friends (two of which are fantastic photographers) gave glowing reviews.

Ingredients:
1/3 cup butter (softened)
1/2 cup cocoa
1/2 cup sugar
1/2 cup brown sugar
1 1/2 cup flour
1/4 cup whipping cream
1 egg
1 tsp vanilla
1/2 tsp baking powder
1/2 tsp baking soda
1/2 tsp salt
3 tbl peanutbutter
1 cup reeses pieces (more or less to your taste of course)

Directions:
  1. Preheat oven to 350
  2. Start by creaming together butter, egg, sugars, cocoa, peanutbutter, and whipping cream
  3. Add in the vanilla, salt, baking powder & soda, mix thoroughly
  4. Work in the flour next, it took a few times scraping the edges of the bowl and restarting the mixer to get it all incorporated
  5. Next come the reeses pieces, mixing them in with a mixer is very loud...
  6. I used a 1 1/2 tablespoon cookie baller to separate out balls of dough, after that you'll need to smush them down with a fork before baking. (if you forget do it right after you take them out of the oven and it will work just as well)
  7. Bake for 8-10 minutes, they come out of sort of puffy but will settle down while cooling.